Indulge in the timeless beauty of Aran knitting with this stunning “Slimline Cardigan” pattern. This design showcases two classic Aran motifs: the intricate “Homes of Donegal” diamond panel and the elegant “Gordian Knot” cable. These rich textures combine to create a long, flattering cardigan that’s both sophisticated and incredibly wearable. The slimline silhouette is perfect for layering, offering warmth without bulk, and the detailed pattern provides a rewarding challenge for experienced knitters.
This cardigan is more than just a garment; it’s a testament to the enduring appeal of traditional knitting techniques. The carefully placed cable panels create a visually captivating design, while the thoughtful shaping ensures a flattering fit. With its buttoned front, practical pockets, and extended length, this aran cardigan is destined to become a cherished staple in your wardrobe, perfect for adding a touch of handcrafted elegance to any outfit. The pattern provides comprehensive instructions, guiding you through each step to create a truly exceptional piece.
Woman’s Slimline Cardigan Knitting Pattern (Complete and Detailed)
Sizes:
- To Fit Bust: 32 [34, 36, 38, 40, 42] inches / 81 [86, 91, 97, 102, 107] cm
- Length from Top of Shoulders: 27 [27, 27.5, 28, 28, 28.5] inches / 69 [70, 70, 71, 71, 72] cm (Note slight variation in lengths)
- Sleeve Seam: 17 inches (43 cm) all sizes.
Materials:
- Yarn: Patons Capstan (Worsted Weight / Yarn Group C) Note: This yarn may be discontinued. Choose a substitute worsted weight yarn that achieves the correct gauge.
- 18 [19, 20, 21, 22, 23] x 50g balls.
- Needles:
- One pair 3.25mm needles (US size 3 / UK size 10) – Smaller Needles
- One pair 4.5mm needles (US size 7 / UK size 7) – Larger Needles
- Cable Needle: (Abbreviated as CN)
- Stitch Holders: 2
- Buttons: 6 buttons.
Tension (Gauge):
- 9 sts and 12 rows = 2 inches (5 cm) measured over stockinette stitch on 4.5mm (US 7) needles. Checking your gauge is essential for a well-fitting garment.
Pattern Notes:
- The pattern uses UK terminology.
- The cardigan is worked in pieces (Back, Left Front, Right Front, Sleeves) and then seamed.
- The button band and buttonhole band are picked up and knitted after the main pieces are complete.

Abbreviations:
- K: Knit
- P: Purl
- St(s): Stitch(es)
- Rep: Repeat
- Beg: Beginning
- K2tog: Knit two stitches together (a decrease)
- St st: Stockinette stitch (Knit on RS, Purl on WS)
- Rem: Remain/Remaining
- RS: Right side
- WS: Wrong side
- Sl: Slip
- Patt: Pattern
- Psso: Pass slipped stitch over
- M1: Make 1 stitch – Pick up the horizontal loop lying before the next stitch and knit into the back of it (this creates a relatively invisible increase).
- C5: Cable 5 – Slip the next 3 sts onto a cable needle and hold at the back of the work, K2, slip the purl stitch from the cable needle back onto the left needle and purl it, then K2 from the cable needle.
- C6: Cable 6 – Slip the next 4 sts onto a cable needle and hold at the front of the work, K2, slip the 2 purl sts from the cable needle back onto the left needle, then slip the 2 knit sts on the cable needle to the back of the work, P2, then K2 from the cable needle.
- Cr3B: Cross 3 Back – Slip the next st onto a cable needle and hold at the back of the work, K2, then P1 from the cable needle.
- Cr3F: Cross 3 Front – Slip the next 2 sts onto a cable needle and hold at the front of the work, P1, then K2 from the cable needle.
- Tw2: Twist 2 – Knit into the front of the 2nd stitch on the left needle, then knit into the front of the first stitch, and slip both stitches off the needle together.
- Yfwd: Yarn Forward
Diamond Panel Pattern (Worked over 21 sts):
- Row 1 (RS): P8, C5, P8.
- Row 2: K8, P2, K1, P2, K8.
- Row 3: P7, Cr3B, P1, Cr3F, P7.
- Row 4: K7, P2, K3, P2, K7.
- Row 5: P6, Cr3B, P1, (K1, yfwd, K1, yfwd, K1) in the next st, P1, Cr3F, P6.
- Row 6: K6, P2, K2, P5, K2, P2, K6.
- Row 7: P5, Cr3B, P2, K5, P2, Cr3F, P5.
- Row 8: K5, P2, K3, P5, K3, P2, K5.
- Row 9: P4, Cr3B, P3, sl1, k1, psso, K1, k2tog, P3, Cr3F, P4.
- Row 10: K4, P2, K4, P3, K4, P2, K4.
- Row 11: P3, Cr3B, P1, (K1, yfwd, K1, yfwd, K1) in the next st, P2, sl1, k2tog, psso, P2, (K1, yfwd, K1, yfwd, K1) in the next st, P1, Cr3F, P3.
- Row 12: K3, P2, K2, P5, K2, P1, K2, P5, K2, P2, K3.
- Row 13: P2, Cr3B, P2, K5, P5, K5, P2, Cr3F, P2.
- Row 14: K2, P2, K3, P5, K5, P5, K3, P2, K2.
- Row 15: P2, Cr3F, P2, sl1, k1, psso, K1, k2tog, P5, sl1, k1, psso, K1, k2tog, P2, Cr3B, P2.
- Row 16: K3, P2, K2, P3, K5, P3, K2, P2, K3.
- Row 17: P3, Cr3F, P1, sl1, k2tog, psso, P2, (K1, yfwd, K1, yfwd, K1) in the next st, P2, sl1, k2tog, psso, P1, Cr3B, P3.
- Row 18: K4, P2, K1, P1, K2, P5, K2, P1, K1, P2, K4.
- Row 19: P4, Cr3F, P3, K5, P3, Cr3B, P4.
- Row 20: K5, P2, K3, P5, K3, P2, K5.
- Row 21: P5, Cr3F, P2, sl1, k1, psso, K1, k2tog, P2, Cr3B, P5.
- Row 22: K6, P2, K2, P3, K2, P2, K6.
- Row 23: P6, Cr3F, P1, sl1, k2tog, psso, P1, Cr3B, P6.
- Row 24: K7, P2, K1, P1, K1, P2, K7.
- Row 25: P7, Cr3F, P1, Cr3B, P7.
- Row 26: As Row 2.
- Row 27: As Row 1.
- Row 28: As Row 2.
- Row 29: P8, K2, P1, K2, P8.
- Row 30: As Row 2.These 30 rows form the Diamond Panel Pattern.
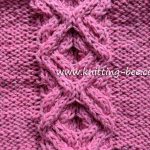
Knotted Cable Panel Pattern (Worked over 10 sts):
- Row 1 (RS): (P2, K2) twice, P2.
- Row 2: (K2, P2) twice, K2.
- Row 3: P2, C6, P2.
- Row 4: As Row 2.
- Rows 5-10: Rep Rows 1 and 2 three times.These 10 rows form the Knotted Cable Panel Pattern.
Instructions:
Back:
- Cast On: With 3.25mm (US 3) needles, cast on 86 [92, 98, 104, 110, 116] sts.
- Twisted Rib:
- Row 1 (RS): * K1 into the back loop, P1; rep from * to end.
- Row 2: K1, * P1 into the back loop; rep from * to end.
- These 2 rows form the K1, P1 twisted rib. Rep them 4 times more (10 rows total).
- Increase Row:
Rib 11,*M1, rib 3; rep from * to last 12 sts, M1, rib 11. (108 [116, 124, 132, 140, 148] sts) I have made some corrections to match stitch counts. - Setup Row (WS):
(K2, P2) 4 [5, 5, 6, 6, 7] times, K8, P2, K1, P2, K8, (P2, K2) 8 [8, 10, 10, 12, 12] times, P2, K8, P2, K1, P2, K8, (P2,K2) 4 [5, 5, 6, 6, 7]times.* - Change to Larger Needles: Change to 4.5mm (US 7) needles.
- Begin Pattern:
- Row 1 (RS): (P2, Tw2) 1 [2, 2, 3, 3, 4] times, work Row 1 of Knotted Cable Panel Patt, Tw2, work Row 1 of Diamond Panel Patt, Tw2, work Row 1 of Knotted Cable Panel Patt, * (Tw2, P2) 2 [2, 4, 4, 6, 6] times, Tw2; rep from * to last set of stitches, work Row 1 of Knotted Cable Panel Patt, Tw2, work Row 1 of Diamond Panel Patt, Tw2, work Row 1 of Knotted Cable Panel Patt, (Tw2, P2) 1 [2, 2, 3, 3, 4] times.
- Row 2 (WS): (K2, P2) 1 [2, 2, 3, 3, 4] times, work Row 2 of Knotted Cable Panel Patt, P2, work Row 2 of Diamond Panel Patt, P2, work Row 2 of Knotted Cable Panel Patt, * (P2, K2) 2 [2, 4, 4, 6, 6] times, P2; rep from * to last set of stitches, work Row 2 of Knotted Cable Panel Patt, P2, work Row 2 of Diamond Panel Patt, P2, work Row 2 of Knotted Cable Panel Patt, (P2, K2) 1 [2, 2, 3, 3, 4] times.
- Row 3: (P2, Tw2) 1 [2, 2, 3, 3, 4] times, work Row 3 of Knotted Cable Panel Patt, Tw2, work Row 3 of Diamond Panel Patt, Tw2, work Row 3 of Knotted Cable Panel Patt, * (Tw2, P2) 2 [2, 4, 4, 6, 6] times, Tw2; rep from * to last set of stitches, work Row 3 of Knotted Cable Panel Patt, Tw2, work Row 3 of Diamond Panel Patt, Tw2, work Row 3 of Knotted Cable Panel Patt, (Tw2, P2) 1 [2, 2, 3, 3, 4] times.
- Row 4: (K2, P2) 1 [2, 2, 3, 3, 4] times, work Row 4 of Knotted Cable Panel Patt, P2, work Row 4 of Diamond Panel Patt, P2, work Row 4 of Knotted Cable Panel Patt, *(P2, K2) 2 [2, 4, 4, 6, 6] times, P2; rep from * to last set of stitches, work Row 4 of Knotted Cable Panel Patt, P2, work Row 4 of Diamond Panel Patt, P2, work Row 4 of Knotted Cable Panel Patt, (P2, K2) 1 [2, 2, 3, 3, 4] times.
- Continue in this way, working the appropriate rows of each panel pattern, until the Back measures 20 inches at the center, ending with a RS row ready for the next row.
- Shape Armholes:
- Keeping the continuity of the panel patterns, cast off 4 sts at the beg of the next 2 rows.
- Dec 1 st at each end of every row until 88 [92, 92, 96, 96, 100] sts remain.
- Then, dec 1 st at each end of the next and every alt row until 76 [80, 84, 88, 92, 96] sts remain.
- Work Straight: Work straight in pattern until the Back measures 26 [26.5, 26.5, 27, 27, 27.5] inches at the center, ending with a RS row ready for the next row.
- Shape Shoulders:
- Cast off 7 [7, 8, 8, 9, 10] sts at the beg of the next 2 rows.
- Cast off 7 [8, 8, 9, 9, 9] sts at the beg of the next 4 rows.
- Continue Neck Shaping: Continue in pattern on the remaining 34 [34, 36, 36, 38, 40] sts and work 8 rows. Cast off in pattern.
Pocket Linings (Make 2):
- Cast On: With 4.5mm (US 7) needles, cast on 22 sts.
- Stockinette Stitch: Work in stockinette stitch for 4 inches, ending with a knit row.
- Increase Row: P3, M1, * (P4, M1) 4 times, P3. (27 sts)
- Leave Stitches: Leave these stitches on a spare needle (stitch holder).
See Related Pattern:
- Free Aran knitting patterns
- Cardigan knitting patterns (500+ patterns)
Left Front:
- Cast On and Rib: With 3.25mm (US 3) needles, cast on 43 [45, 49, 51, 55, 57] sts and work 10 rows in twisted rib as follows:
- Row 1 (RS): * K1 into the back loop, P1; rep from * to the last st, K1 into the back loop.
- Row 2: * P1 into the back loop, K1; rep from * to the last st, P1 into the back loop.
- Increase Row:
- Rib 3 [6, 2, 6, 2, 6], M1, * rib 4 [3, 4, 3, 4, 3], M1; rep from * to the last 4 [6, 3, 6, 1, 6] sts, rib 4 [6, 3, 6, 1, 6]. (53 [57, 61, 65, 69, 73] sts)
- Setup Row (WS):
(K2, P2) 4 [4, 5, 5, 6, 6] times, K8, P2, K1, P2, K8, (P2, K2) 4 [5, 5, 6, 6, 7] times. - Change to Larger Needles: Change to 4.5mm (US 7) needles.
- Begin Pattern:
- Row 1 (RS): (P2, Tw2) 1 [2, 2, 3, 3, 4] times, work Row 1 of Knotted Cable Panel Patt, * Tw2, work Row 1 of Diamond Panel Patt, Tw2; rep from * to last set of stitches, work row 1 of knotted panel, (Tw2, P2) 1 [1, 2, 2, 3, 3] times.
- Row 2 (WS): (K2, P2) 1 [1, 2, 2, 3, 3] times, work Row 2 of Knotted Cable Panel Patt, * P2, work Row 2 of Diamond Panel Patt, P2; rep from * to last set of stitches, work row 2 of knotted panel, (P2, K2) 1 [2, 2, 3, 3, 4] times.
- Continue in this way, working the appropriate rows of each panel pattern, until the Front measures 6 inches, ending with a RS row ready for the next row.
- Place Pocket Lining:
- Next Row: Patt 13 [17, 17, 21, 21, 25], slip the next 27 sts onto a stitch holder, and in place of these, patt across the stitches of the first Pocket Lining, patt 13 [13, 17, 17, 21, 21].
- Continue in Pattern: Continue straight in pattern until the Front measures 17 inches at the center, ending with a RS row ready for the next row.
- Shape Front Slope: Dec 1 st at the front edge on the next and every following 3rd row until 46 [50, 54, 58, 62, 66] sts remain.
- Work 1 Row.
- Continue Shaping Front Slope and Shape Armhole:
- Next Row: Cast off 4 sts, patt to end.
- Next Row: Work 2tog, patt to end.
- Now dec 1 st at the armhole edge on every row, at the same time dec 1 st at the front slope on every 3rd row from the previous decrease until 33 [35, 33, 35, 33, 35] sts remain.
- Continue Decreasing:
- Continue decreasing at the front slope on every 3rd row as before, at the same time dec 1 st at the armhole edge on the next and following 5 [5, 3, 3, 1, 1] alt rows. (24 [25, 27, 28, 30, 32] sts)
- Straight Armhole Edge: Keeping the armhole edge straight, continue decreasing at the front slope only on every 3rd row until 21 [23, 24, 26, 27, 28] sts remain.
- Work Straight: Work straight until the Front matches the Back at the armhole edge, ending with a RS row ready for the next row.
- Shape Shoulder:
- Cast off 7 [7, 8, 8, 9, 10] sts at the beg of the next row.
- Cast off 7 [8, 8, 9, 9, 9] sts at the beg of the following alt row.
- Work 1 row.
- Cast off.
Right Front:
- Cast On and Rib: Work as for the Left Front from the beginning to the end of the increase row in the ribbing.
- Setup Row:
(K2, P2) 4 [5, 5, 6, 6, 7] times, K8, P2, K1, P2, K8, (P2, K2) 4 [4, 5, 5, 6, 6] times. - Change to Larger Needles: Change to 4.5mm (US 7) needles.
- Begin Pattern:
- Row 1 (RS): (P2, Tw2) 1 [1, 2, 2, 3, 3] times, work Row 1 of Knotted Cable Panel Patt, * Tw2, work Row 1 of Diamond Panel Patt, Tw2; rep from * to last set of stitches, work first row of knotted cable, (Tw2, P2) 1 [2, 2, 3, 3, 4] times.
- Row 2 (WS): (K2, P2) 1 [2, 2, 3, 3, 4] times, work Row 2 of Knotted Cable Panel Patt, * P2, work Row 2 of Diamond Panel Patt, P2; rep from * to last set of stitches, work second row of knotted cable, (P2, K2) 1 [1, 2, 2, 3, 3] times.
- Complete to correspond with the Left Front, reversing the shaping. Note that the Pocket Lining will be placed as follows:
- Patt 13 [13, 17, 17, 21, 21], slip the next 27 sts onto a stitch holder, and in place of these, patt across the stitches of the 2nd Pocket Lining, patt 13 [17, 17, 21, 21, 25].
Sleeves (Make Two):
- Cast On: With 3.25mm (US 3) needles, cast on 36 [40, 40, 44, 44, 50] sts.
- Twisted Rib: Work 10 rows in K1, P1 twisted rib as on the Back.
- Increase Row:
Rib 5 [3, 3, 1, 1, 2], * M1, rib 2; rep from * to last 5 [3, 3, 1, 1, 2] sts, rib 5 [3, 3, 1, 1, 2]. (50 [56, 56, 64, 64, 72] sts.) I have corrected what appears to be yet another error to get to the desired number of stitches. - Setup Row (WS):
- K2, P2, K2; rep from * to end.
- Change to Larger Needles: Change to 4.5mm (US 7) needles.
- Begin Pattern:
- Row 1 (RS): (P2, Tw2) 5 [6, 6, 7, 7, 8] times, work Row 1 of Knotted Cable Panel Patt, (Tw2, P2) 5 [6, 6, 7, 7, 8] times.
- Row 2 (WS): (K2, P2) 5 [6, 6, 7, 7, 8] times, work Row 2 of Knotted Cable Panel Patt, (P2, K2) 5 [6, 6, 7, 7, 8] times.
- Continue in Tw2, P2 rib, working the Knotted Cable Panel Patt over the 10 center stitches.
- Shape Sides: Inc 1 st at each end of the 7th and every following 6th row until there are 74 [82, 82, 90, 90, 98] sts, taking the increased stitches into the Tw2, P2 rib.
- Work Straight: Work straight in pattern until the sleeve seam measures 17 inches, ending with a RS row ready for the next row.
- Shape Top:
- Cast off 4 sts at the beg of the next 2 rows.
- Dec 1 st at each end of the next and every alt row until 58 [66, 66, 78, 78, 86] sts remain.
- Work 1 row.
- Then dec 1 st at each end of every row until 22 sts remain.
- Cast off 2 sts at the beg of the next 2 rows (18 sts).
- Continue straight in pattern on these 18 sts for the saddle until the strip, when slightly stretched, fits along the shoulder edge.
- Cast off in pattern.
Making Up, Borders, and Pocket Tops:
- Block (Recommended): With the WS of the work facing, block each piece by pinning it out to the correct measurements (omitting the ribbing). Press lightly, following the instructions on the yarn ball band, taking care not to flatten the pattern.
- Join Seams: Using a flat seam for the ribbing and a fine backstitch seam for the remainder, join the side seams and sleeve seams.
- Insert Sleeves: Insert the sleeves, then sew the saddle strips along the shoulders on the Back and Fronts, and sew half of the cast-off sts to the extra rows at the top of the Back.
- Right Front Border:
- With the RS facing and 3.25mm (US 3) needles, pick up and knit 98 sts up the right front to the start of the front slope shaping, 52 [56, 56, 60, 60, 64] sts up the front slope, 6 sts across the saddle, and 17 [17, 17, 19, 19, 19] sts to the center back of the neck. (173 [177, 177, 183, 183, 187] sts)
- Row 1: * P1 into the back loop, K1, P1 into the back loop; rep from * to end.
- Row 2: * K1 into the back loop, P1, K1 into the back loop; rep from * to end.
- Continue in K1, P1 twisted rib and work 1 more row.
- Buttonhole Rows:
- Next Row: Rib 5, cast off 3 sts, * (rib 15, including the stitch on the needle after casting off, cast off 3 sts); rep from * 5 times total, rib to end.
- Next Row: Rib to end, casting on 3 sts over those cast off in the previous row.
- Work a further 4 rows in rib.
- Cast off evenly in rib.
- Left Front Border:
- With the RS facing and 3.25mm (US 3) needles, start at the center back of the neck and work to correspond with the Right Border, omitting the buttonholes.
- Join Borders: Join the Borders neatly at the center back of the neck.
- Pocket Tops:
- With the RS facing and 3.25mm (US 3) needles, work 7 rows in rib as for the Border across the 27 pocket sts (from the stitch holders), starting with a 2nd row of the rib pattern.
- Cast off evenly in rib.
- Attach Pockets: Catch down the sides of the Pocket Tops neatly to the RS of the work, and sew the Pocket Linings lightly on the WS.
- Press Seams: Press the seams.
- Sew on Buttons: Sew on the buttons.
Reformatted vintage pattern to make it easier to read and follow. I’ve also added some notes to improve clarity where the original pattern might be ambiguous (by knitting-bee). Find the original pattern: here